How to Send an Audience to Facebook
Endless targeting. Limitless growth. Increased loyalty & LTV.
- Connect your Facebook account to Peel
a. Go to Connections and Datasets on the menu on the left
b. Click onAdd Datasource
c. Select Facebook from the list on the right and enter in your account information to connect your Facebook account to Peel - Select an Audience you would like to send to Facebook on the left nav
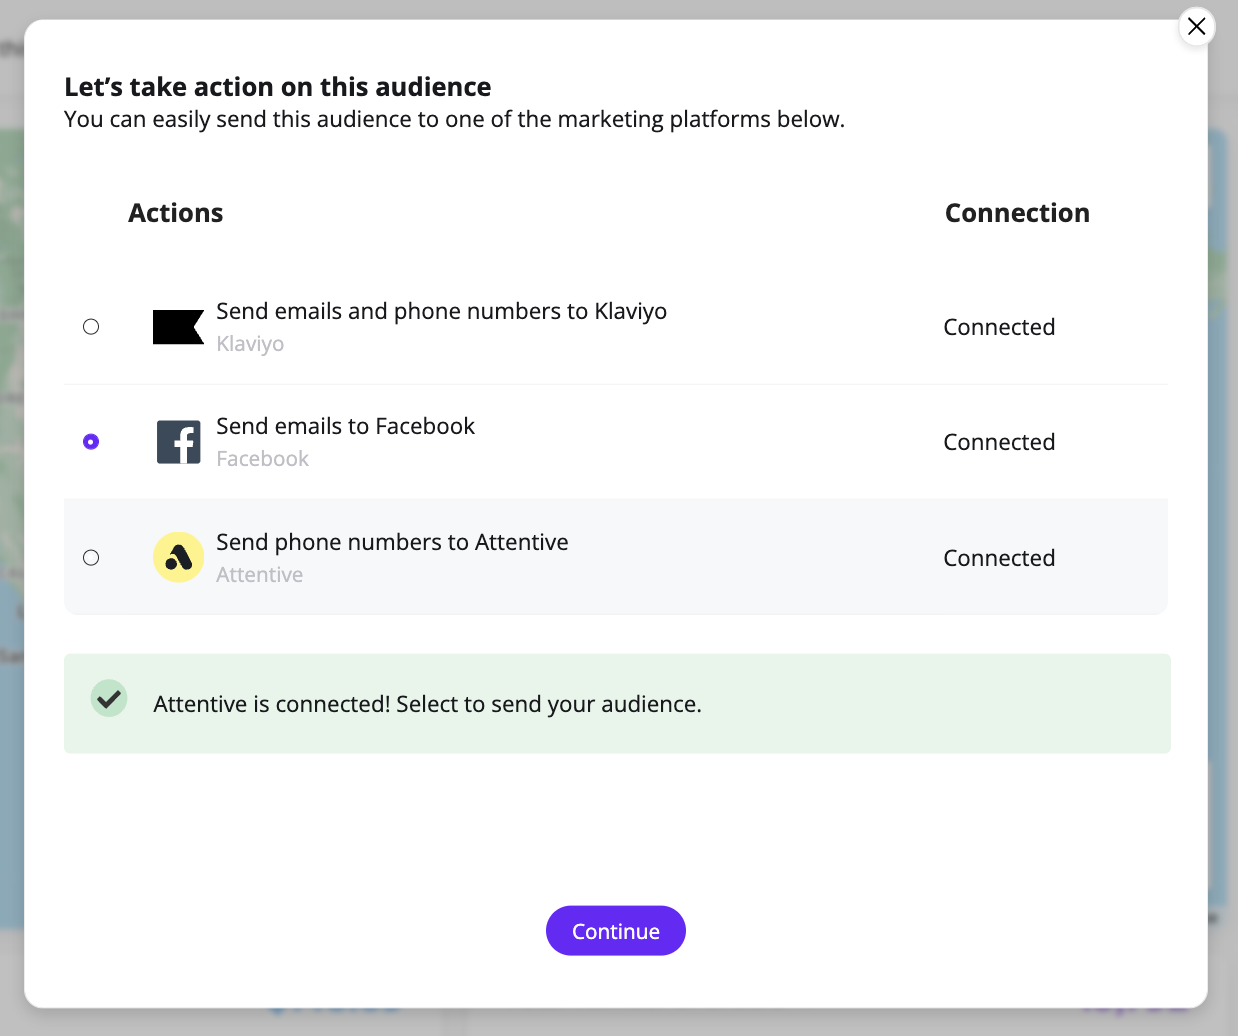
- From the audience page, click the
Sendbutton on the top right corner

- Select
Send emails to Facebookfrom the available selections and clickContinue

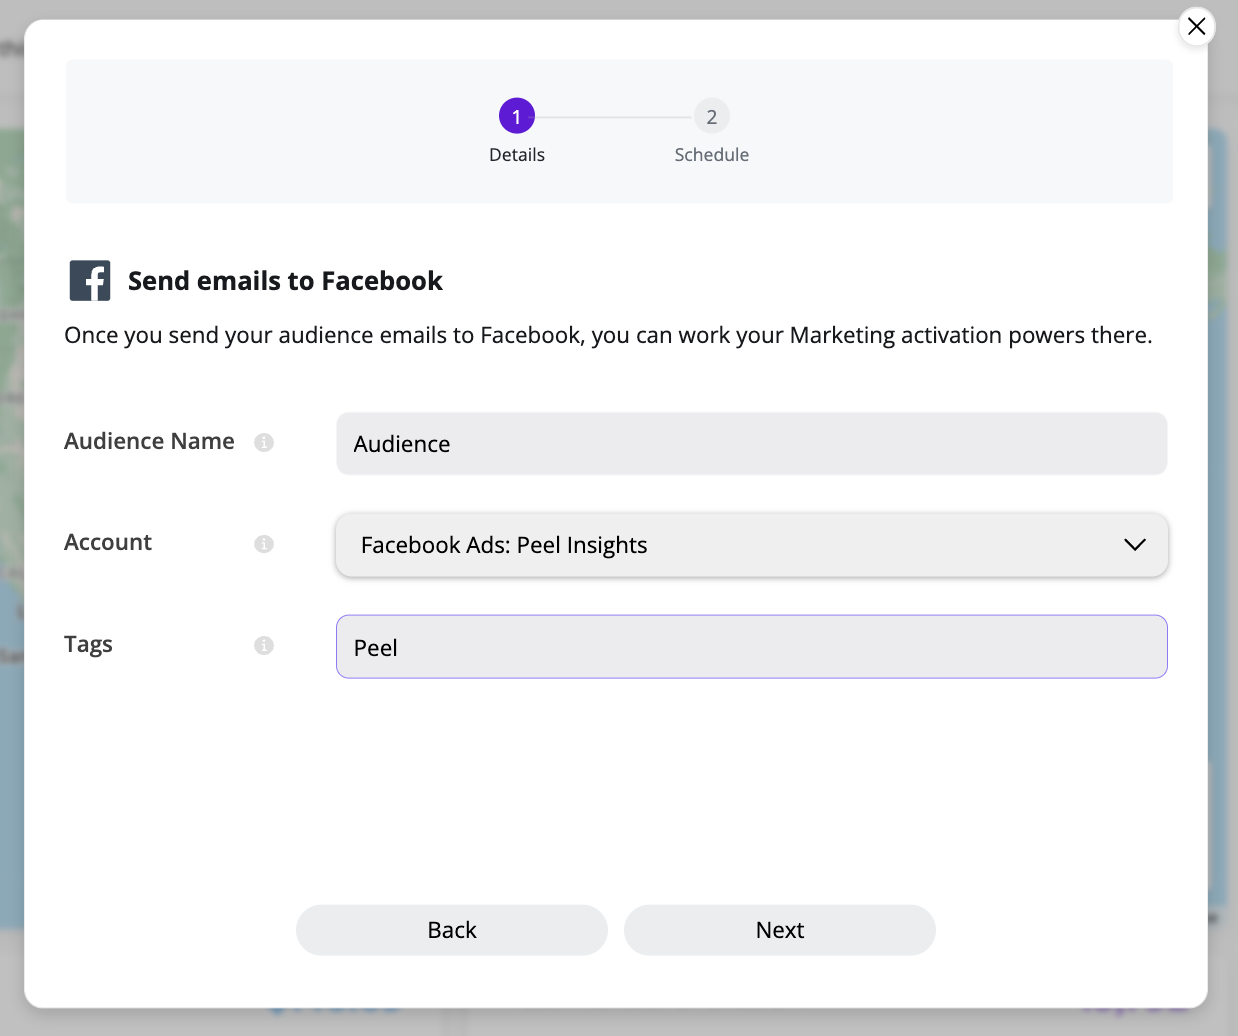
- Give your Audience a name (this is how it will appear in Facebook)
- Select which Facebook account you would like the send your audience to from the dropdown menu (only if you have multiple accounts connected to Peel)
- Add a tag to your audience to label it in Facebook

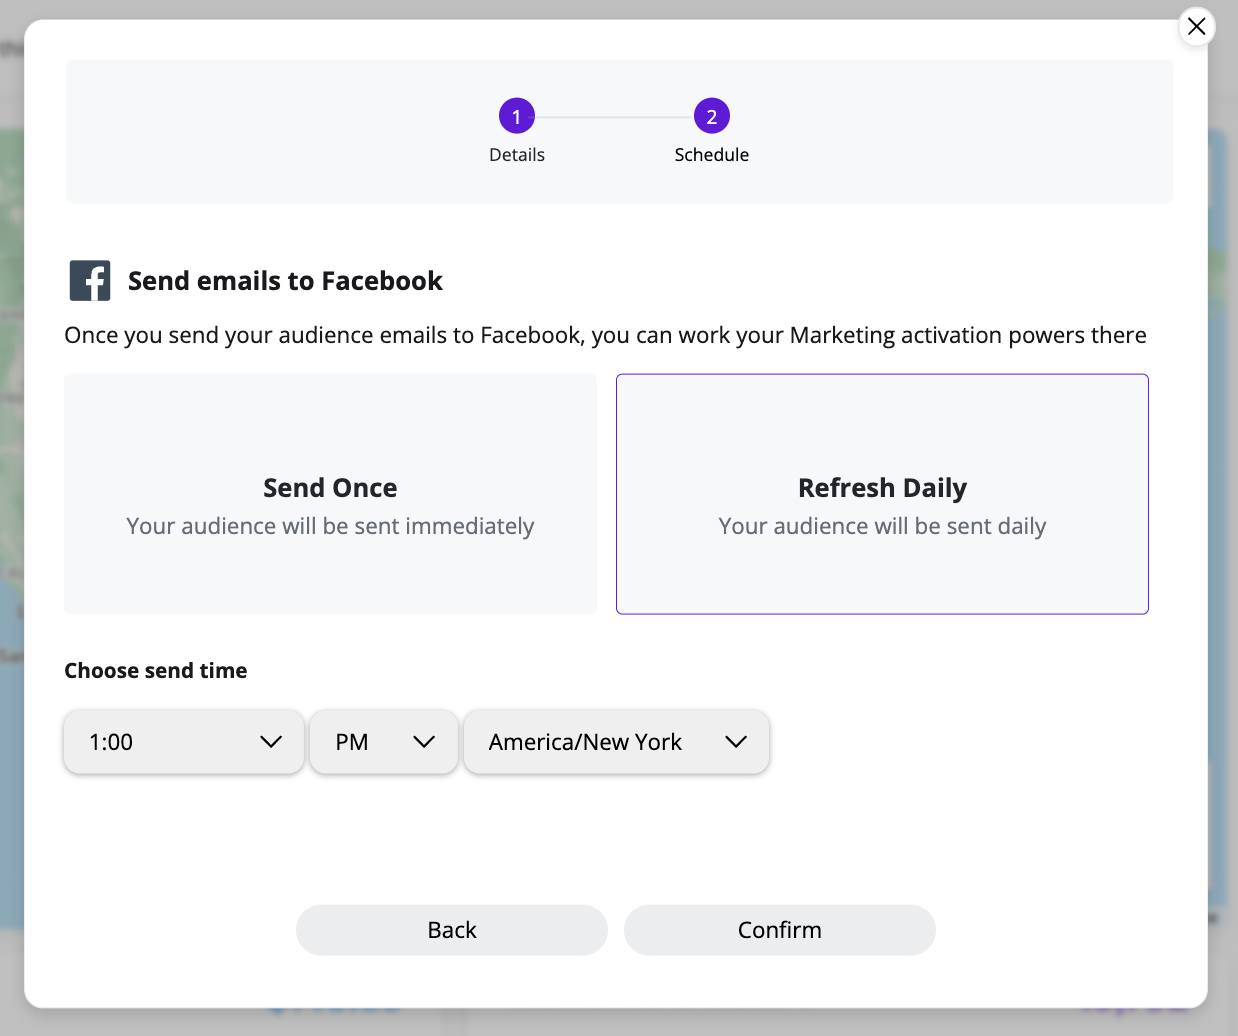
- On the next screen, select
Send Onceto send the audience to Facebook immediately one time.
Or select ‘Refresh daily’ to send your audience to Facebook on a daily basis. Here you can select what time you would like the audience to be sent to Facebook.

- You have successfully sent your audience to Facebook! You can work your Marketing activation powers there!
Updated 9 months ago